Friday, May 30, 2014

Bleeding Tissue Sunset {Art + Science}

Have you heard of bleeding art tissue? As soon as I did, it was added to my must-make art projects. But, if I'm being totally honest, my oldest boy is not a fan of art. "It's not my thing, Mom," he always says. (sigh)

This mama with an art history degree is always looking for sneaky ways to make art fun. This art lesson is cleverly disguised as a science extension.


We read Why Does the Sun Set? by Violet Miller to truly understand what's happening when the sky is filled vibrant oranges and pinks.


Then we got busy making our own sunset.

After reassuring my son that we weren't going to paint, his interest was piqued. I cut loads of small squares of bleeding art tissue with my paper cutter. NOTE: Regular gift wrap tissue will not produce the vibrant colors that this art tissue will.


He wet a large piece of watercolor paper with a small sponge. Then I laid a small circular plastic lid at the bottom to simulate our sun. He arranged pieces of tissue around it - first orange, then pink, red, purple, blue, and light blue at the top of the page. The wet paper helped our pieces of tissue stick.


Lastly, he spritzed the paper with a squirt bottle filled with water.

Now we let it dry overnight. In the morning, he pulled all the tissue squares off to reveal the sunset underneath. Beautiful!

He was pretty proud of it!


Wednesday, May 28, 2014

Battle of the States {free printable game}


My oldest son (8 1/2 years old) has always had a fascination with U.S. geography and the history of the states. This game combines both.


To make your own deck of states cards, download the 7-page PDF I made here. Print on cardstock.

If you're worried the cards will be see-through, spritz the back of the printed pages with spray glue (in a well-ventilated area) and adhere a lightweight piece of scrapbook paper to the glued side before cutting out.


Now grab your kid and get ready to play.

Shuffle the deck and divide it in half with the cards face down. Each player turns over the top card on their deck, keeping it to themselves. Then, the youngest player names a category (e.g. population, number of counties, electoral votes, etc.). 

The opponent reads the number from that category on their card and the youngest player does the same. For all categories but one, the player with the largest number is the winner and takes the opponent's card, setting both their card and their opponent's card in a pile in front of them face up.

If a player selects the "statehood" category, the winner is the player with the card containing the earliest statehood year.


The player that wins the round selects the category for the next one.

If the category called results in both players announcing the same number from their cards (e.g. both states have the same number of electoral votes), two more cards are drawn and compared. The player to win, takes all four cards.


When the decks are out of cards, players compare the number of collected cards from their wins. You can count them or straighten and set the decks side-by-side. The player with the most cards wins.


Monday, May 26, 2014

After School Linky Party (5-26)

Welcome to the After School Linky Party!


I hope you are having a wonderful holiday weekend.

Here are just a handful of the great activities and ideas shared at last week's party.


Woodland Animal Hunt at Mothers Madness.


7 Busy Bags with Paint Chips at The Chaos and the Clutter.


Dancing Blueberries at Life with Moore Babies.


Dye Art for Kids at Kids Activities Blog.


The After School Linky is cohosted by
Relentlessly Fun, Deceptively Educational

We would love to have you link up your School-Age Post (Ages 5 and up) about your learning week after school including Crafts, Activities, Playtime and Adventures that you are doing to enrich your children's lives after their day at school, home school, or on the weekend!

When linking up, please take a moment to comment on at least one post linked up before yours and grab our after school button to include a link on your post or site! By linking up, you're giving permission for us to share on our After School Pinterest Board and feature an image on our After School Party in the upcoming weeks!

Friday, May 23, 2014

DIY Water Fountain

This is a great activity when talking about air. You can't see it, but it's there. For kids, that's tough to imagine.


What You Need
1 emptied plastic bottle
1 plastic drinking straw
Poster tack adhesive
Latex party balloon
Craft knife
Water
Basin to catch the water
Funnel (optional)

Beginning Explorations
Show your child the balloon before and after it's inflated. Why is it so big when it's blown up? There's air in there!

Now ask him/her to examine the plastic bottle. "Is there anything in it?" I asked. "No, it's empty," my sons replied, to which I responded, "Are you sure?" They were sure. Hm.

So I took the blown up balloon and stretch the neck of the balloon over the bottle top. Before I let go of the neck, I asked my boys to make predictions. The oldest was convinced … downright adamant really … that the balloon would deflate.

When it didn't, he was stunned. "OOOOhhhhhh, I get it. The bottle isn't empty; it's filled with air!" That's why the balloon doesn't deflate, the air in the balloon has nowhere to go because the bottle is already full of air itself.

The Experiment
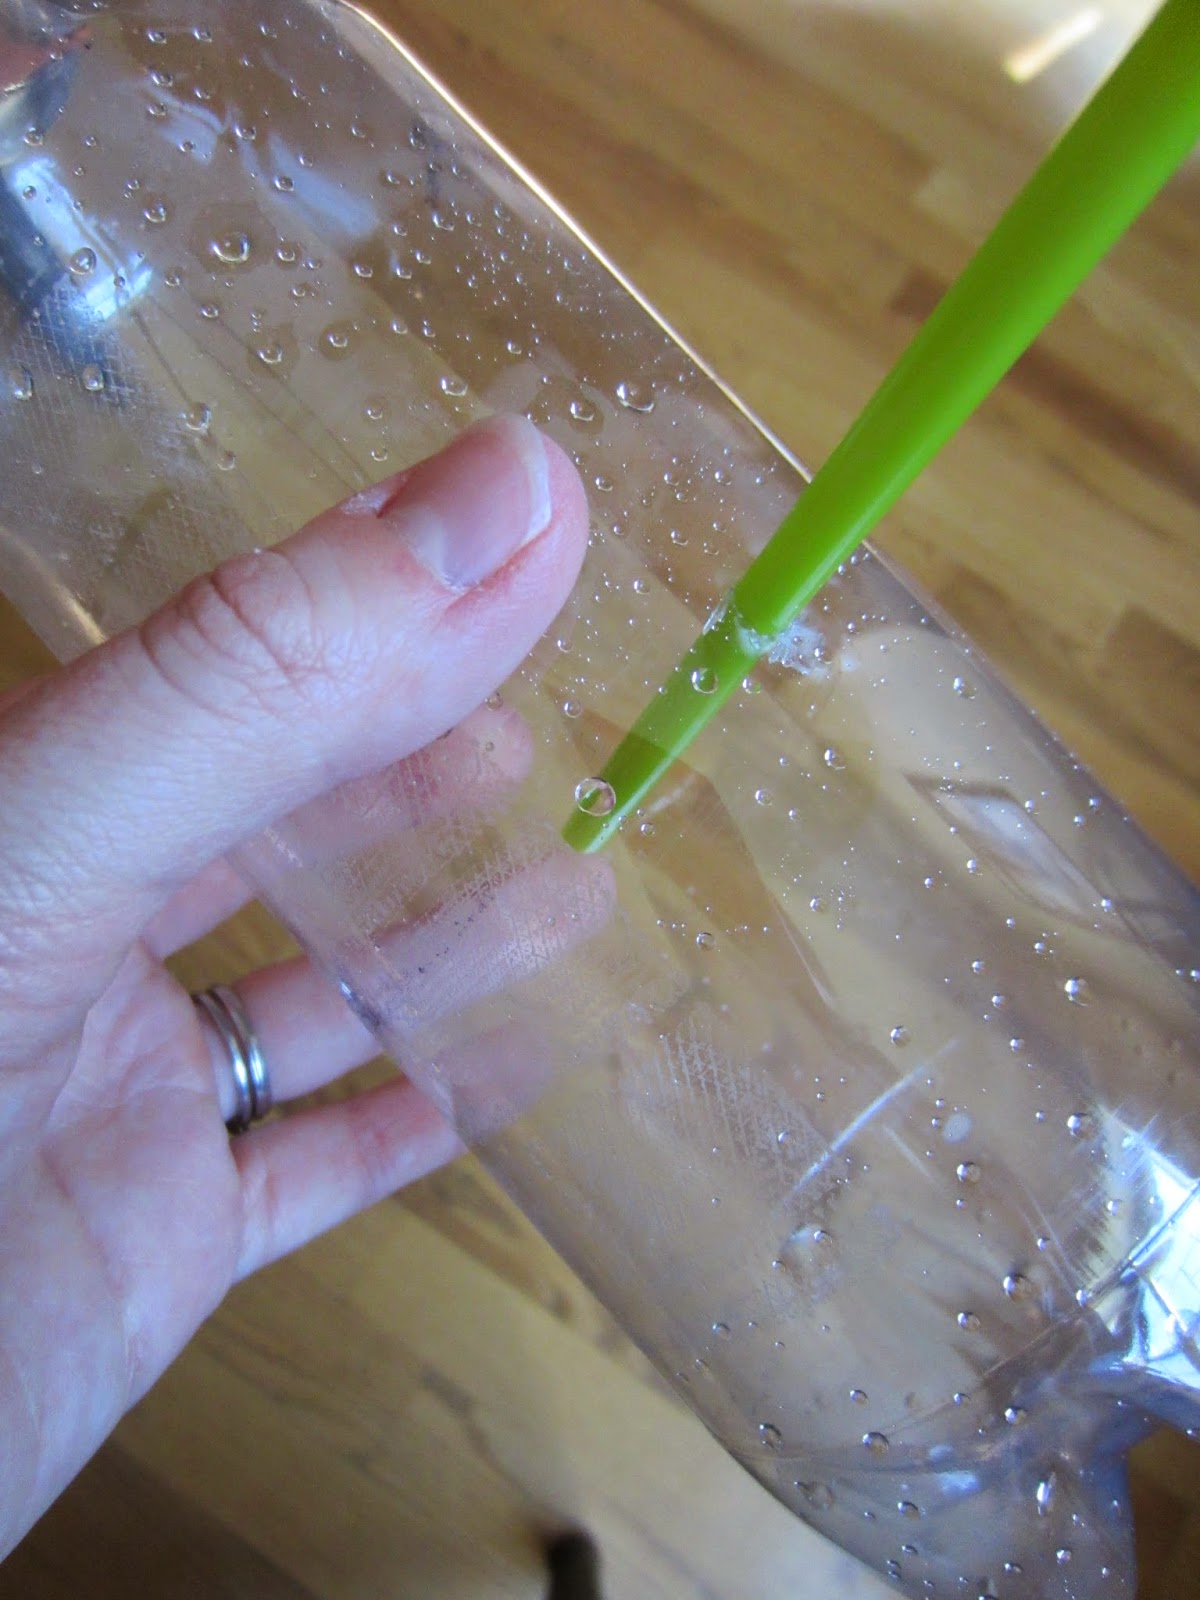
Now I removed the balloon from the bottle, cut a small circle the size of the drinking straw circumference out of one side of the bottle. I pushed the straw through.


My oldest son used the poster tack to seal any air leaks around the hole/straw.


With the straw pointing downward inside the bottle, I had my sons use a funnel to pour water inside the bottle so that it was filled just below where the hole was.


Now I blew up the balloon again and asked them to form a hypothesis about what would happen when the balloon was on the bottle.

With the balloon stretched over the bottle top, the boys' jaws both dropped. As the air in the balloon deflated, it created pressure, which forced the water to come shooting out of the straw.


At the very end, our steady stream of water sputtered and squirted, overshooting the 9 x 13 Pyrex baking dish we were using to catch the water. They exploded in laughter! (Note: this would be a great outdoor activity on a hot day or could be done in the bathtub to eliminate clean up.)

Afterwards my oldest son explained to me why our water fountain worked: the movement/force of air!

This simple science activity was made with materials you probably already have around the house and provides truly impressive results.


Credit for this activity goes to Learn With Play at Home.

Wednesday, May 21, 2014

Balls and Shapes Bullseye Game


Finding a game for multi-agers can be difficult. This game is extremely simple and can be customized to challenge kids at varying levels.


All you need is a piece of paper and pencil for scoring, painters tape, and a few small balls.

Set up
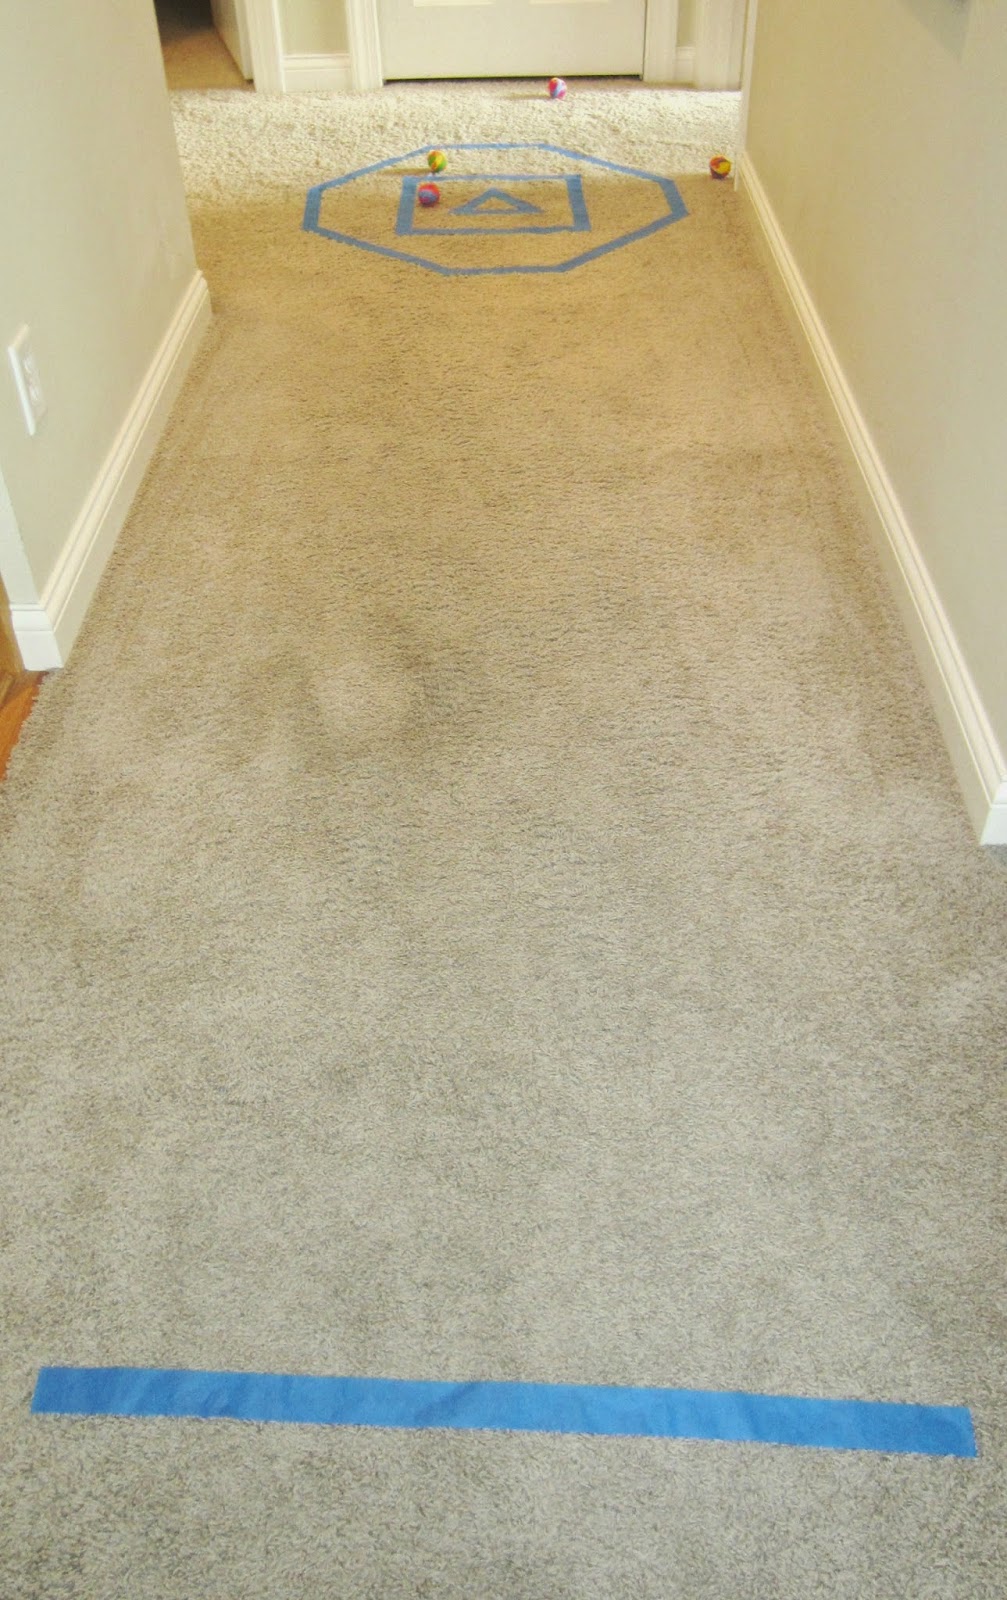
Using the painters tape, make three different shapes, one inside the other, on the floor. Ours were a triangle inside a rectangle, inside an octagon. Add a strip of tape for a starting line about five or six feet back.


Now grab your kids and some balls.

How We Played
I tore off a piece of paper from a notepad and wrote down the points for each shape.


My two sons took turns tossing three balls at the shapes bullseye. When it landed in a shape, they'd proclaim, "You got an octagon!" or "It landed in the triangle." This was great reinforcement of the shapes for my four year old!

My oldest son kept score (i.e. got some math practice in).


They played five rounds and then the score was totaled. The player with the most points wins.
Smart. Simple. Cheap. Fun. All you need are balls and a shapes bullseye made of tape!


This activity was inspired by What to Expect.

Monday, May 19, 2014

After School Linky Party (5-19)

Welcome to the After School Linky Party!


Summer is right around the corner. I don't know about you, but I'm pinning activities like crazy in anticipation of "Mom, I'm bored!"

Here are just a few of my favorite activities from last week's party.


Nonfiction Summer Reading List at What Do We Do All Day?

 Spring Flowers at Art Club Blog.


 Polymer Science: Homemade Fruit Gummies at Left Brain Craft Brain.

Sight Words and Spelling Words Tic Tac Toe at A Mom With a Lesson Plan.


The After School Linky is cohosted by
Relentlessly Fun, Deceptively Educational

We would love to have you link up your School-Age Post (Ages 5 and up) about your learning week after school including Crafts, Activities, Playtime and Adventures that you are doing to enrich your children's lives after their day at school, home school, or on the weekend!

When linking up, please take a moment to comment on at least one post linked up before yours and grab our after school button to include a link on your post or site! By linking up, you're giving permission for us to share on our After School Pinterest Board and feature an image on our After School Party in the upcoming weeks!


Friday, May 16, 2014

Plastic Cup Jumpin' Frogs


This activity is light on education and heavy on fun. Sometimes that's just what a kid needs after a day of reviewing for year-end tests at school.


Here's what you need for each jumping frog:
2 of the same kind of sturdy disposable plastic drinking cups
2 rubber bands
paper punch
paper and glue (we used sticker paper)
Markers/colored pencils

Here's how to make it:
Draw a frog on a small piece of paper. I gave my son these step-by-step instructions to help him. 


When I complimented him on how great his frog was, he said, "I usually stink at art!" I was surprised to hear that his art teacher has never walked him through this type of drawing tutorial before.


When his frog was finished, he cut it out. Now we got our cups ready. One is left as is. The other one needs to be adapted. 

Punch four holes just above the rim of the glass, so all the holes are opposite each other. Now cut two rubberbands so they become long stretchy strings. Tie them to the holes in the cups so the rubberband forms an X. Trim off some of the excess rubberband.


Now adhere your frog picture to the adapted cup, so that the frog's feet are near the rim of the cup and its head is near the bottom of the cup.

How to make froggy jump:
Place the regular cup upside down on the table.  Place the froggy cup on top and push it down. As you release, the cup will come springing back. Jump, froggy, jump!


When I returned from yoga that evening, I heard there was a pretty fun tournament between my two boys. I needed to look no further than my oldest son's frog cup to see who was triumphant. The word "champion" was written in black permanent ink on the side of one of his cups. It seems my husband got to bear witness to just how fun our afterschooling is!

This great idea was adapted from instructions provided at Frugal Fun For Boys.

Wednesday, May 14, 2014

2 Paper Flyers


There's been a lot of paper crafting at my house lately, thanks to my oldest son's obsession with Tom Angleberger's Origami Yoda book series. While we're at the kitchen table folding up the whole cast of Star Wars, I thought I'd work in a few other crafts - namely paper flyers.

My oldest boy loves a good DIY toy. (He gets that from me.)


Flying Paper Whirligig
As a kid I used to pick up sycamore seeds and throw them into the air to make them spin back down to the ground. These whirligigs remind me of those seeds.


Making them is simple. Don't let the instructions fool you.

Start with a long rectangular piece of paper about 2 inches by 6 inches; we used origami paper but plain 'ol office paper will do. Draw your lines (dotted and solid like the picture below). 


You will cut on the solid lines and fold on the dotted lines.

Fold the paper in on the two long dotted lines to make a handle for what now looks like a small spade of paper. Fold the end of the handle up and adhere with a small piece of tape. Slide a small paper clip (as a weight) over the folded and taped end.

Next fold one side of the spade shovel down along the dotted line. Flip the paper over and do the same to the other side, so your whirligig's blades are pointing in opposite directions. You're done!


Hold the whirligig in the air and drop it. Watch it gracefully spin to the ground (and if you're like my son, drop it over the stair railing to see it spin for a greater distance).

This idea came from Babble Dabble Do. She's got a great photo tutorial so head over there if you're stumped.


Straw Plane
This next craft is a must-do for paper airplane aficionados. It looks nothing like a plane, but boy oh boy, does it glide through the air with streamlined precision. Impressive is an understatement.


Cut two strips of cardstock paper, one 1 inch by 10 inches, and the other 1 inch by 5 inches. Tape them into two circle shapes.

Now take a plastic drinking straw and adhere each with more tape to the  ends of the straw. You're done!


Now hold it by the middle of the straw, and propel your wrist forward releasing it into the air. It keeps going and going and going. This is one of the farthest flying "planes" we've ever made (and we've made A LOT of paper airplanes).

This idea came from Discover Explore Learn.


These crafts provide an excellent opportunity to explain aerodynamics, opposing thrust, and gravity. Kids can experiment by adjusting the size of the papers, the number of paper clips on the whirligig, the length of the straw, to observe and record any variance in the performance of the flyer.

Monday, May 12, 2014

After School Linky Party (5-12)

Welcome to the After School Linky Party!


Week after week, bloggers share their best and brightest ideas.
Here are just a few of my favorite activities from the May 5th linky.


Playful Learning - Letter Formation at Lemon Lime Adventures.


The After School Linky is cohosted by
Relentlessly Fun, Deceptively Educational

We would love to have you link up your School-Age Post (Ages 5 and up) about your learning week after school including Crafts, Activities, Playtime and Adventures that you are doing to enrich your children's lives after their day at school, home school, or on the weekend!

When linking up, please take a moment to comment on at least one post linked up before yours and grab our after school button to include a link on your post or site! By linking up, you're giving permission for us to share on our After School Pinterest Board and feature an image on our After School Party in the upcoming weeks!


Friday, May 9, 2014

DIY Lava Lamp


Truth be told, this "lava" doesn't light up. But it's still guaranteed to generate some oohs and ahs from your kiddos. Here's how we made our DIY lava lamp.


Supplies
Oil (we used baby oil, but cooking [e.g. vegetable] oil will work too)
3/4 cup water
food coloring
alka seltzer tablets
empty plastic water bottle
funnel (optional)

How to Make It
Pour the water into your bottle. (Use a funnel if you've got one.) Now pour the oil in, filling the bottle 2/3rds full.


Invite your child to observe the contents of the bottle. Did the oil and water mix? The oil will be sitting on top of the water because it's the less dense of the two liquids.

Add several droplets of food coloring into the bottle. Again - observe and hypothesize. Why doesn't the oil turn color? Hint: it's water-based!


Now you're ready for the fun part. Break up a few alka seltzer tablets and drop them in the bottle. Watch the reaction (both inside AND on your child's face) as blobs of colored water rise up through the oil just like in a lava lamp!

When the fizzing stops and the oil and water separate again, you can add more tablets to keep the excitement going.


My son didn't know quite what to expect but found the chemical reaction fascinating, so much so that he had to invite a neighborhood friend over to see it, and then capped the bottle to take to his house so his mom and little brother could witness it too! And when his dad and little brother got home, yep, more tablets were added so they could also see it.


Any activity that makes my son this enthusiastic gets an A+ from me!